Power BI Tutorials
Written By: Sajagan Thirugnanam and Austin Levine
Last Updated on October 29, 2024
Have you ever struggled to get data from a different service into Power BI? Today we will discuss one such data platform service: Snowflake and how to get data from this Software-as-a-Service (SaaS) into Power BI so you can use the data in your next report.
Snowflake is one of the top platforms for cloud-based data storage and has become more and more popular over the past few years. This means that integration with Power BI is a must for data people like us! I regularly use Snowflake as a data source for most of my reports in Power BI given it is our main data warehousing system in our business and I will share how I go about getting data from the platform keeping in mind the use case and the two different connection types in which we can get data.
So without further ado, let’s get into it!
Step by Step Guide: Connect Power BI To Snowflake
To connect to Snowflake from Power BI, follow these steps:
Step 1: Get Data
From Power BI Desktop, click on Get Data on the top ribbon and select Snowflake from the list of database connector options.
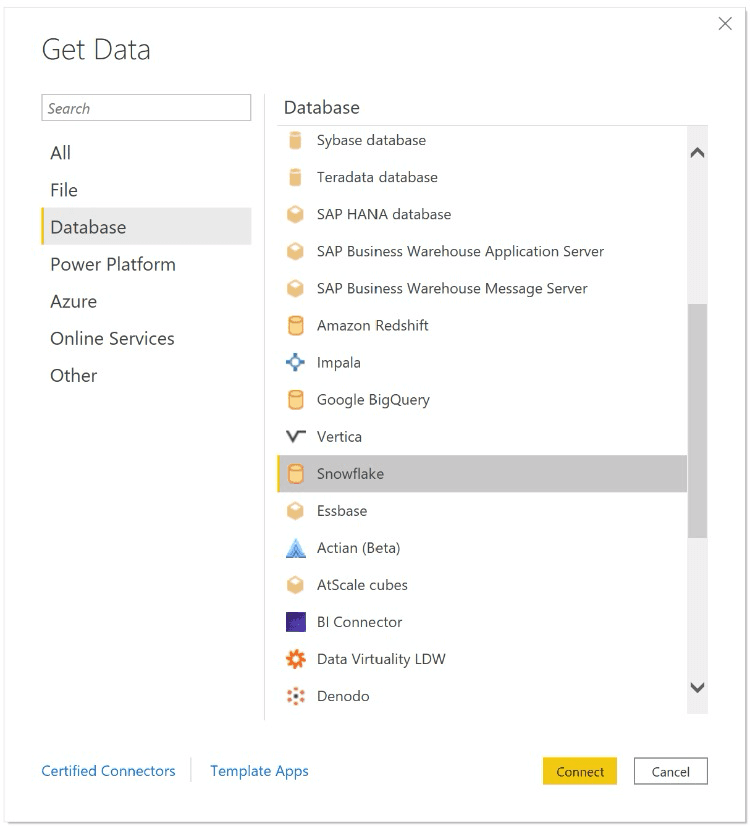
Step 2: Enter Server and Warehouse Info
In the pop-up window, enter your Snowflake server and Warehouse details from which you want to get the data.
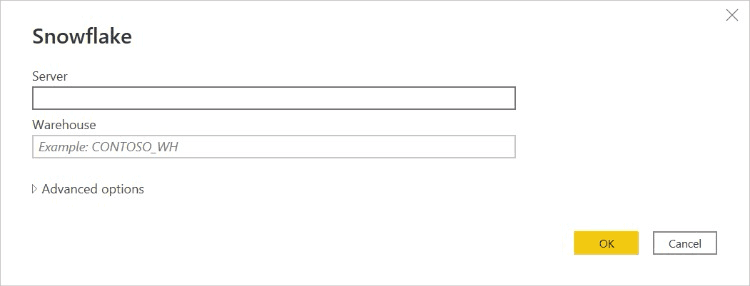
You can also expand the Advanced Options and add a custom SQL query to get data as per your specific requirements. Here you can also enter values you want to use to modify the connection query, such as a command timeout or role name.
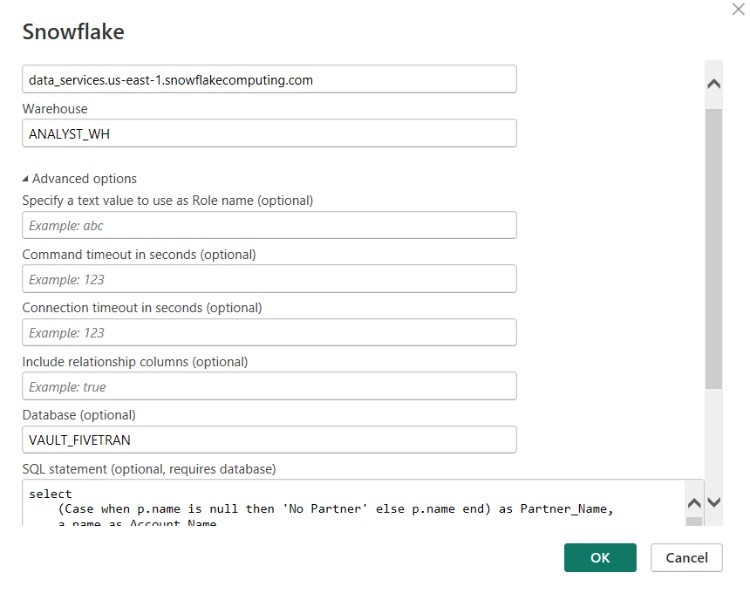
Once complete, click on OK.
Step 3: Enter Username and Password
Next, sign in to your Snowflake computing warehouse using your username and password, and then select Connect.
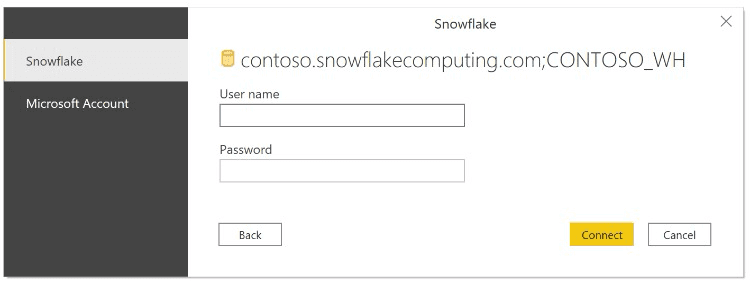
Please note that once you enter your username and password for a particular Snowflake server, Power BI Desktop uses those same credentials in subsequent connection attempts. You can modify those credentials by going to File > Options and settings > Data source settings.
Step 4: Select Tables To Import
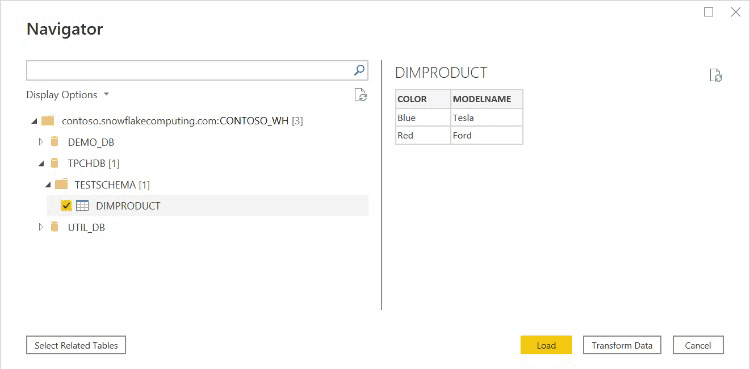
From this window, you can select the table/s you want to import. On the right side panel, you will also see a preview of the data which can help you check whether or not you have the correct table selected.
Once selected, you can either directly load the data by clicking on Load or click the Transform Data button to open Power Query Editor to modify the data. Here you can filter the data or remove unnecessary columns to reduce the size of the data. Once done, you can then load the data into your report.
Step 5: Select Connection Type
Select which connection type is appropriate for your report. Select either Import or Direct Query and then click on OK.
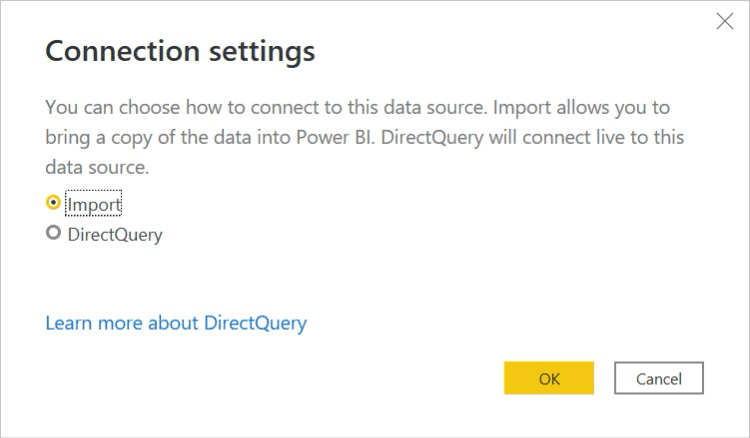
You might be a bit confused at this point. How do these two connection types differ and what should you choose for your next report?
Do not worry, in this next section, I will break it down for you and take you through the differences.
What are the Two Connection Types for Power BI to Snowflake?
Import
With the Import Mode, a copy of the data resides in the Power BI data model and is compressed down to be stored efficiently. This type of connection is much faster compared to direct query as a copy of the data is stored in-house. This is why Power BI considers this to be the default connection type when the option pops up.
This is not to mention that there aren’t any drawbacks of this connection type. You can only store datasets using the import mode for up to 1GB in size and data refresh is usually delayed as there is no live connection to the data source and you have to schedule refresh in Power BI service.
Direct Query
This type of connection mode means there is a live connection to the data source. Meaning every time the report is loaded, there is a request sent to the data source and data is pulled from the data source instantly rather than keeping a copy of the data within the Power BI model.
This is useful for real-time reporting such as a Sales dashboard where the data warehouse generates large volumes of data and you want to see the live order numbers of your business which is updated every minute. However, do remember to use this only when required for your specific requirement - otherwise, the overall performance of your report will be slower than optimum.
In Conclusion
I hope this article serves as a guideline on how to connect to Snowflake from Power BI. It is a relatively straightforward approach and can become muscle memory if you know the steps by heart.
Connecting Power BI to Snowflake enables organizations to create powerful and insightful visualizations based on their cloud data. Both these platforms are extremely powerful in their own right but together they can truly unleash the power of data in the modern world driven by numbers and data.
FAQs
Why is Snowflake so useful?
Snowflake enables data storage, processing, and analytic solutions that are faster, easier to use, and far more flexible than traditional offerings. It is one of the leading cloud-based data storage systems in the world today and has several other benefits why people are using the SaaS platform today.
Is Snowflake similar to Power BI?
Power BI and Snowflake are two platforms that complement each other perfectly, with Snowflake providing users with a comprehensive solution for data storage and Power BI offering a robust visualization tool.
Related to Power BI Tutorials